
Pitching is one of the most simple looking, complicated things in all of sports.
On the surface, it looks like you just windup and chuck it. Some parents down at your local field may think “some kids got it and some kids don’t”. But what I’ve been able to do the last 10 months proves that statement wrong. While genetics definitely play a role at young ages, quality coaching and developing has a major effect. Research is pretty clear on a few things. First, coordination, balance, and rhythm all improve with coaching. Second, throwing velocity is improved with training. If you learn to move more efficiently, gain core and lower body strength, and train the arm to move fast you can dominate at the youth level as a thrower. Once you become a great thrower you need to learn the art of pitching. This article will detail an easy to follow method that includes checkpoints to help a dad on the weekend or a coach with his young team.
It’s tough to win a race with a bad start
Posture and positions are the two key things I’ve learned to focus on when coaching pitchers. This isn’t from my brain, but from pitching coaches smarter than myself that I’ve had the fortune of spending time around. If you get into a bad position early in the throw, it’s unlikely you have a good end result. There are players talented enough to compensate for a bad start. But, compensating this way will lead to breaking down sooner in your career. Instead of relying on compensating at the end of each throw, the better long term strategy is learning a few key positions . These key positions are easy to coach and don’t take away the unique movements that make each pitcher special. Lift, land, finish. At older ages, the only extra cue I add is “drift”. Lift, drift, land, finish. Some kids may only need “drift, finish” while others may need “land, finish”. It’s up to you as a coach to know how your athlete learns and pick which cues make the most sense to that pitcher.
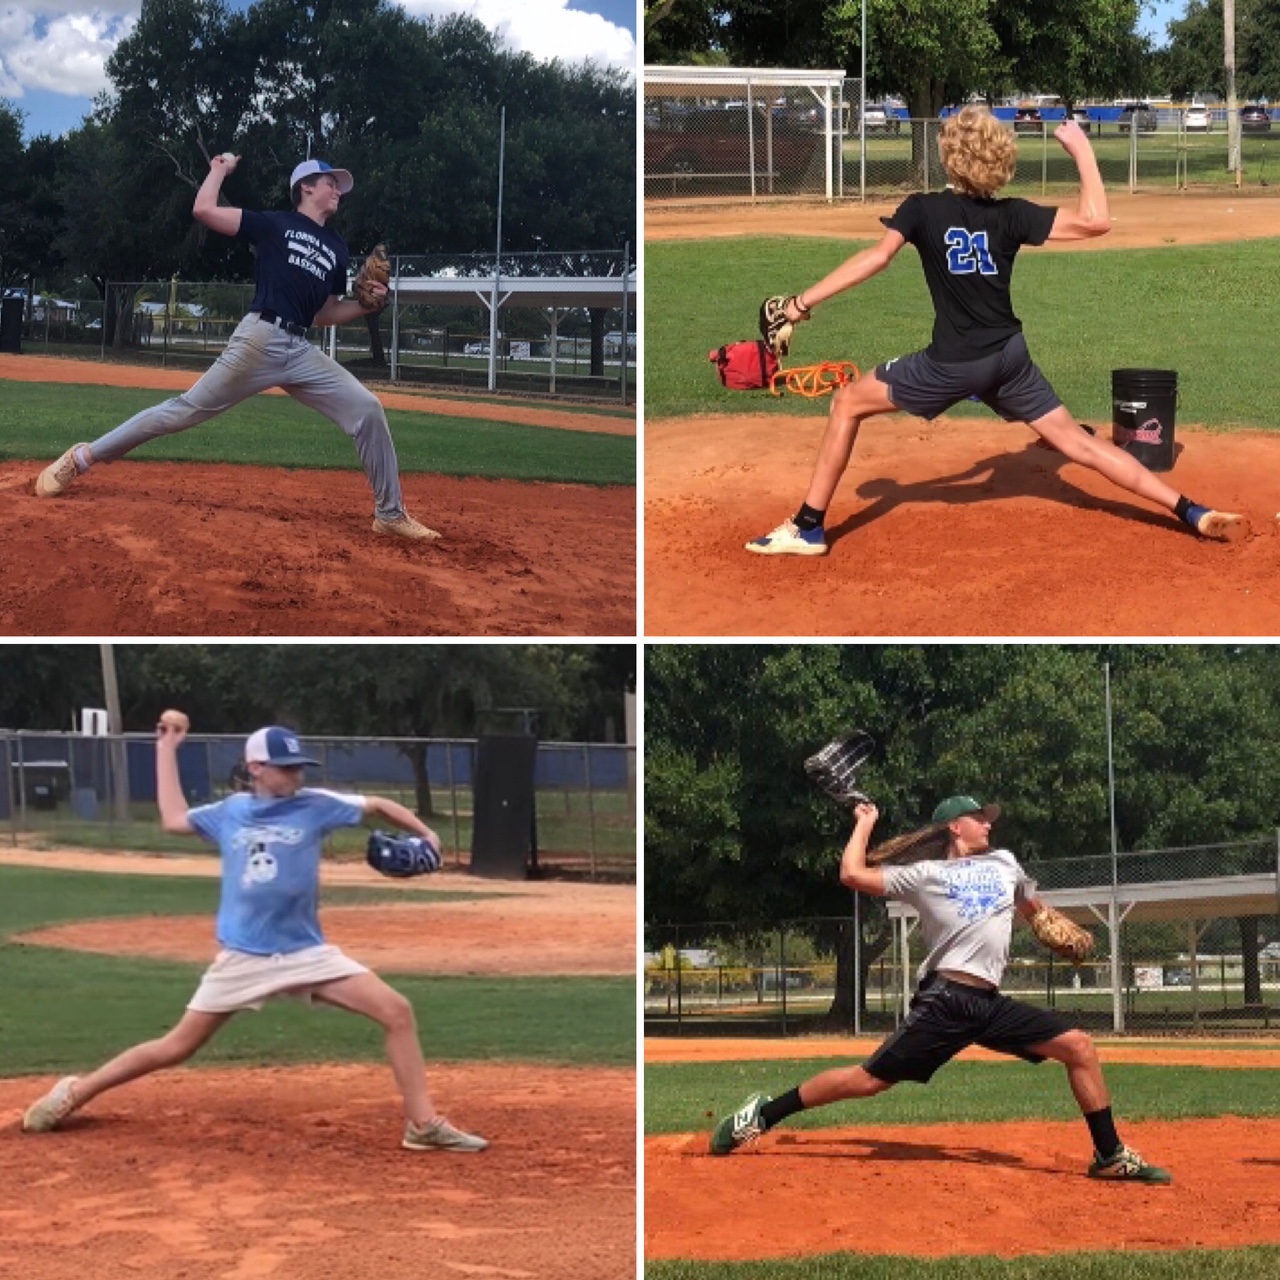
3 key positions to coach
High point in the knee
This position is wherever the top point of the lead knee is. We can’t say some uniform height for all because each kid is different and not all pitchers have the same range of motion in the hip. So, whatever their comfortable “high point” is that is repeatable and with little effort is optimal. Down the road, this may change. For now, less complicated is best.
Coach’s cue: “Pick your front leg up to a high point. Once you hit that high point, now we start the throw.”
Lead leg landing
The next important benchmark for me as a coach is what posture my pitchers have when their lead leg lands. Are they falling over out of control? Do they have a good foundation underneath them? Are they stable enough in their lower half to accelerate their upper half? Where is the chin and chest in relation to the lead knee? Is the arm loose or flexed tight? Have the hips already rotated open or are they closed ready to rotate? These are important questions to ask each time the front foot lands because of the implications they have on the result of the throw. If the chin and chest are already over the front leg, we have collapsed too early. If the hips have already rotated, the throw is going to be all upper half. If the arm is stiff and flexed the arm won’t be able to move fast like we need it. If the arm is in a bad position, the ball will not be out on time. Some pitcher makes a late correction and somehow throw a strike. But more often than not, these landing issues will lead to lower percentage results. So, it’s important to learn even at young ages, that the front foot landing is a key checkpoint.
Coach’s cue: Feel the front leg land. Try to keep the chin and chest behind the front foot until it’s time to go.

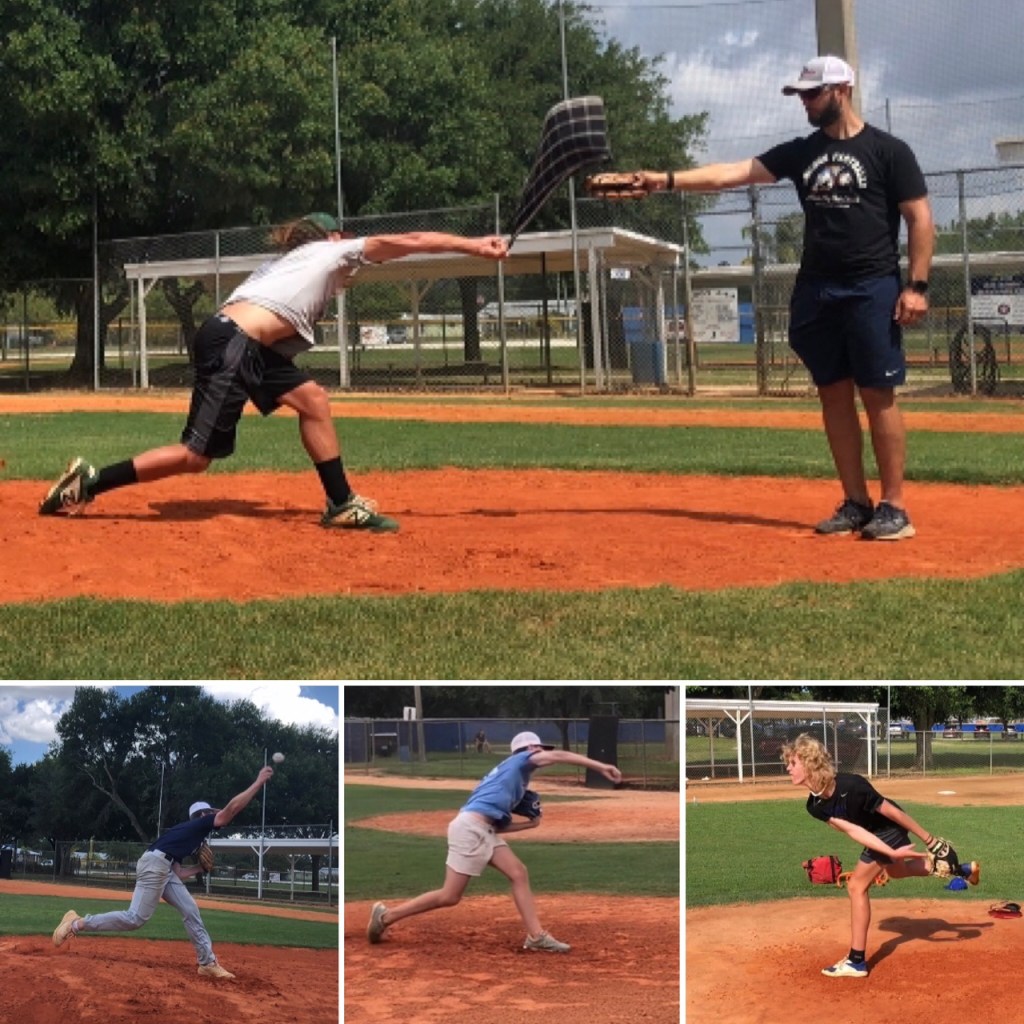
Finish your throw
Another common issue I see with youth pitchers is at the end of their throw. Instead of bending at the waist to finish the throw, they stay upright and stiff. This is the pitcher that does a full windup, looks good halfway down, and then gets stuck. Instead of continuing momentum downhill, they pull the e-brake and come to a screeching halt. Visually, it looks like the pitcher slams into a wall as the ball rolls off the hand. Some of you reading may remember the old towel drill. By tying one end of a small towel into a knot, you can go through your motion holding the towel and pop it out front. This drill helps to understand how the finish should feel. While it’s not my go-to drill, it has helped certain pitchers gain a better understanding. Finishing tall stops the energy and momentum created at the earlier checkpoints. So, we need to see the shoulders finish over the front leg. Don’t complicate this.
Coach’s cue: Chin and chest finish over the front foot as you reach you reach the ball out to the catcher’s glove.
My goal of the article wasn’t to complicate pitching. Again, this is a combination of what I’ve seen that last year coaching pitchers and being around coaches with more knowledge than myself. Giving kids easy to remember checkpoints has given me the best results. Our focus when developing young pitchers should not be making them think so much they can’t be an athlete. These checkpoints can work for a dad taking their kid down or a coach during bullpens with their team.
We aren’t making robots
I want to remind you that each pitcher doesn’t need to look the same. We aren’t coaching pitchers to be robots. If pitcher A looks different than pitcher B it doesn’t mean they are bad or incorrect. Chris Sale would never have thrown like he does if his little league coach made him throw like Greg Maddux. Randy Johnson was dominant throwing different than Clayton Kershaw. We have to accept that each motion is unique and celebrate that. Often times, the kid who throws more unconventional gets more outs. Remember, if we were watching pitching 40 years ago it would look more like Satchel Paige than Jacob Degrom.
“Hey kid you’re gonna hurt your arm like that”
Little league coaches today may have looked at a young Walter Johnson and said “don’t throw like that it will hurt your arm”. Why do we associate funky deliveries with arm trouble with no research to back the statement? Arm slots are not nearly as damaging to kids as pitching both days of a weekend travel ball tournament. So why the fuss? We associate arm health to being conventional. Often times, forcing a 3/4 arm slot to throw more over top is creating more arm trouble than fixing it. Not to mention that 3/4 arm slot with arm side run became flatter and may even make them less effective as a pitcher. We have to tread carefully when changing the natural movement signature of kids. Instead, can we focus on the body delivering the arm on time?
Take home message:
- High point in the knee
- Stable landing with the front leg to accept weight
- Finish with the shoulders over the front side
If these things happen in sequence, typically the answer is yes. Practice that over and over until each pitcher at least has a basic understanding of each checkpoint. Sometimes the answer is that the kid doesn’t have the strength to hold certain positions. In that case, I highly recommend getting onto a strength program to enhance the physical capabilities of the athlete. Yelling the same thing over and over won’t get the result to change. Mobility, balance, coordination, strength, power are all things to work on outside of specific pitching practice.
If this article was helpful, please like and share with someone else that may get something from it.
